I LOVE using masking fluid. Once it’s dry it can be peeled off, revealing the untouched white paper underneath. It’s a bit like magic!
I first encountered this medium during my college days and since then have had a great relationship with it. I’ve just launched a Skillshare class on using this medium, which includes more in-depth tips and fun projects.
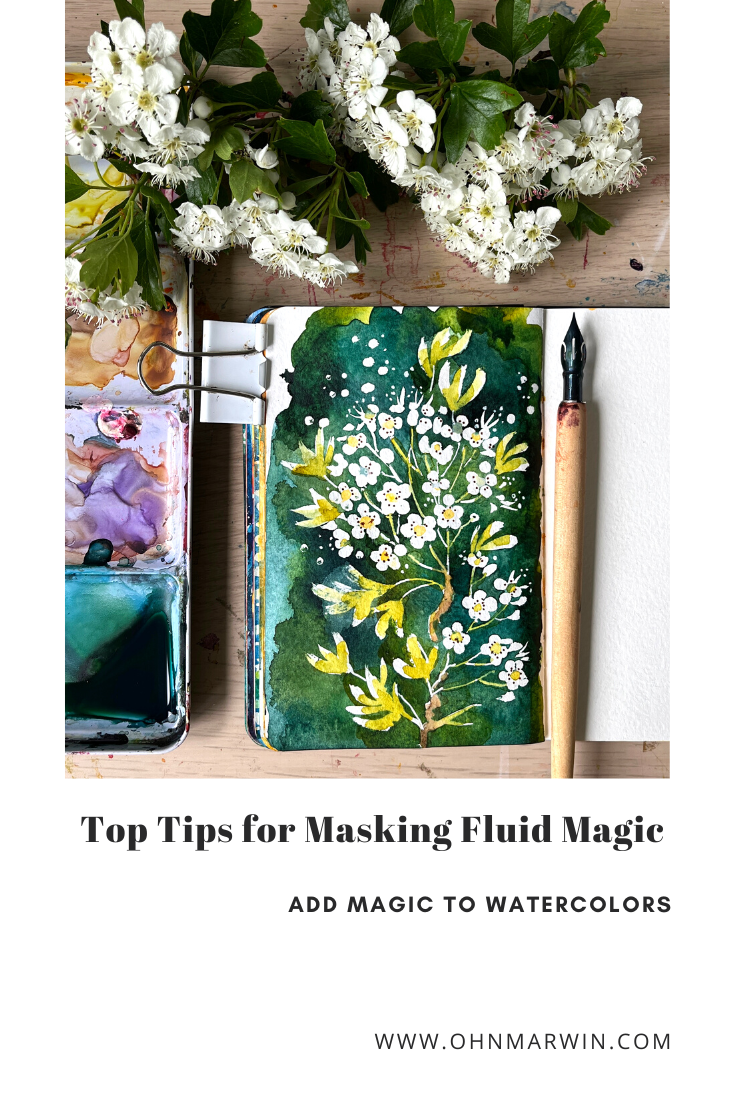
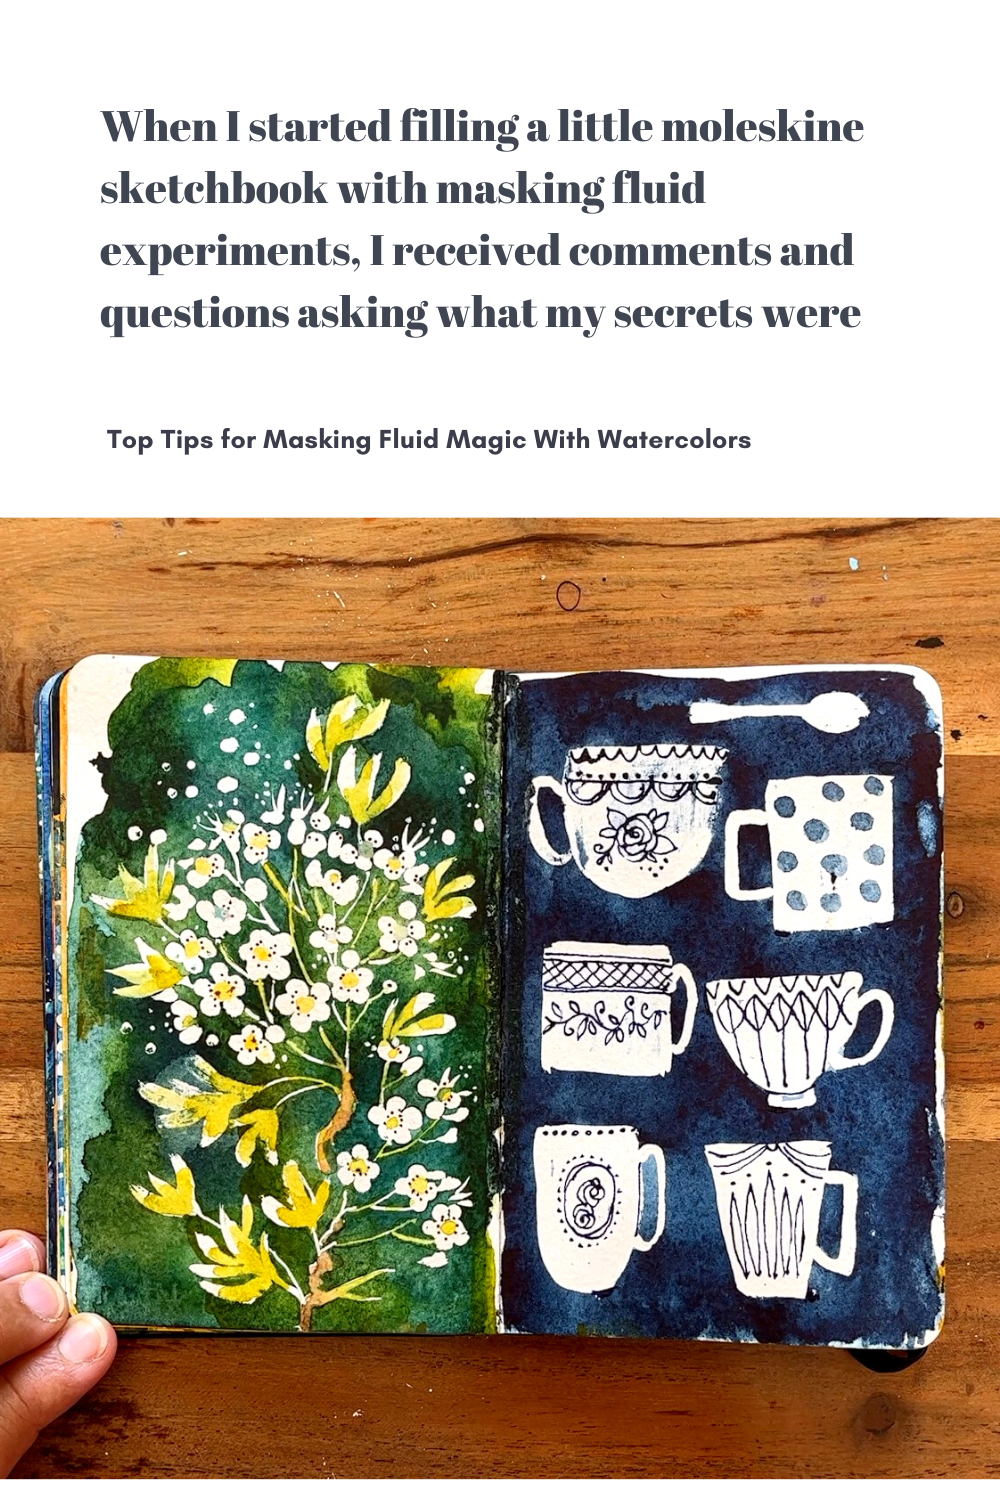
When I started filling a little moleskine sketchbook with masking fluid experiments, I got a deluge of comments and questions asking what my secrets were, as many just couldn't get their masking fluid to behave. Their paper was often torn when removing it or their colors smudged. Many ruined brushes. So it’s no surprise some give up after a few attempts. Before you abandon masking fluid entirely, here are some answers to frequently asked questions and some top tips for success with masking fluid.
What Is Masking Fluid Used For?
Sometimes called frisket or drawing gum, it’s basically a latex or rubber-based medium that can be applied to dry watercolor paper before you paint on it. The masking fluid will adhere to the paper, and once it is dry it can be painted over in watercolor or ink. When the whole painting is dry, the latex film can be carefully peeled off, leaving the white surface of the paper untouched.
How Do You Apply Masking Fluid?
It's most common to use an old or cheap brush to apply masking fluid. However, I use a variety of tools to apply the masking fluid to the paper, dependending on the effects that I want to achieve. Sometimes I allow masking fluid to build up on what I call a ‘grotty brush’ or ‘busted’ brush—that's when I leave the masking fluid to harden and use it like that to create some unique lines.
Some other applicators you might like to try are:
Dip pen
Q-tips
Cocktail sticks
Toothbrush
Twigs
How Do You Clean Masking Fluid from Paint Brushes?
To preserve the bristles, even on cheap brushes, it's advisable to wet them and then coat them with some soap or liquid detergent before you dip the brush into the fluid. This will protect the bristles and make the brush much easier to clean off by placing it under running water as soon as you’ve finished.
I sometimes use a dip pen for fine line application of masking fluid, and again you can either wash the nib under running water or if it dries onto the nib simply peel it off (which is quite satisfying, I find).
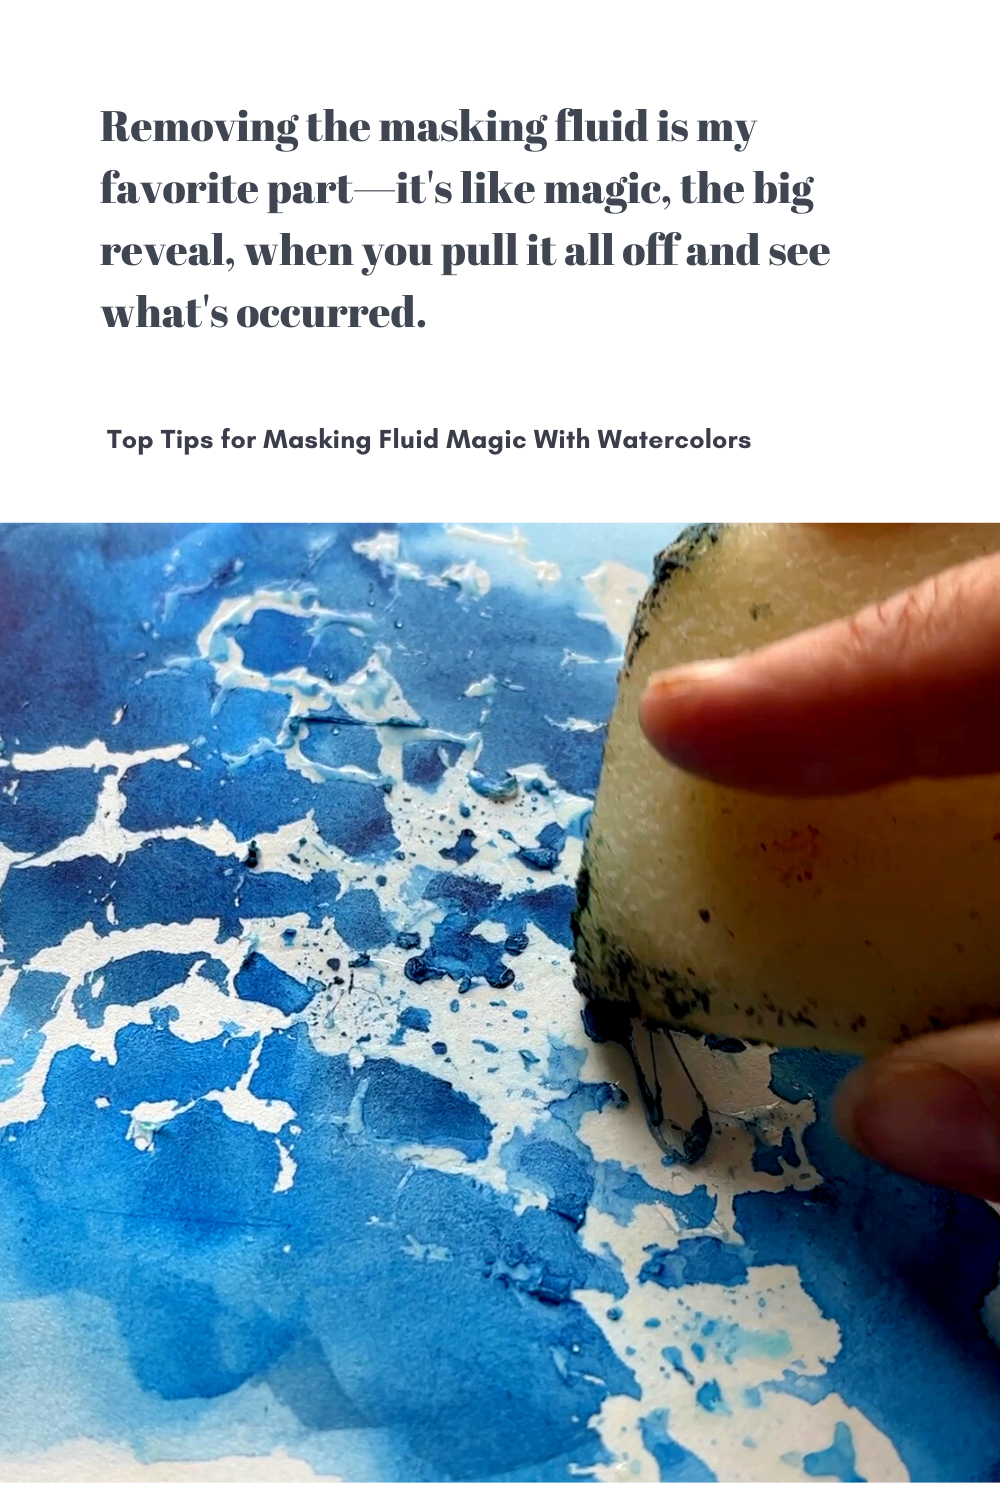
How Do You Remove Masking Fluid from Watercolor Paper?
Removing the masking fluid is my favorite part—it's like magic, the big reveal, when you pull it all off and see what's occurred.
There are several methods you might like to try and see which suits you best.
Fingers
Start by rubbing gently at one of the edges until it starts to lift. Once it starts to come away, gently and carefully pull it off.
Eraser
This is a popular method, however I’d recommend an eraser that's a neutral color rather than red or blue as you will also have to deal with leaving coloured eraser dust on your art.
Masking Fluid Remover Block
This is a new art supply that I’ve tried recently. It helps prevent you from pulling too hard and tearing your paper, and it doesn't leave crumbs behind like typical erasers.
Why Does Masking Fluid Tear My Paper?
There are a few reasons why this can occur. The most common mistake is not waiting until the watercolor paint is fully dry (after applying the masking fluid) and peeling off the mask too soon. Don't just hope it's dry—you have to be totally certain. Be patient!
Also, handmade papers or other softer papers are more prone to tearing. While very rough papers may be tricky as texture of bumps and crevices provides extra surface for the mask to grab onto, making it hard to remove without causing the paper to tear.

My Tips For Using Masking Fluid
Don't use too much—the masking fluid should be pretty flat, thin and smooth on the paper (when applied with a brush). Try not to apply it too clumpy, blobby or thick.
I’ve learnt the hard way NOT to use a hot hair dryer on your painting if it has masking fluid on it, as it’ll adhere to the paper even more making it trickier to remove.
ALWAYS test your masking fluid on a small piece of the paper you intend to use before committing to actual painting.
Don’t allow masking fluid to stay on your paper for more than two days, as again it will be harder to remove and could tear the paper.
Don't forget to check out my NEW Skillshare class on masking fluid for a fun deep dive
There are 10 demos, starting with some warm ups that will build up your practical knowledge and patience. Followed by some really fun projects covering florals, patterns, landscapes and food.
If you are new to using masking fluid, unsuccessfully tried it in the past or seeking to find fun ways of incorporating it into your watercolor practice then this class will provide many effective tips. Think beyond the brush to achieve an array of different textures and effects using masking fluid.
You will consider:
which papers work best
the different drying stages we have to be mindful of
successful removal of masking fluid after it’s dried